3D Printer Enclosure - Smoke Alarm Shutdown
The smoke alarm shutdown in action – that’s a can of “test smoke”
Why the smoke alarms?
Chinese “clone” printers have made 3D printers accessible as hobbyist equipment by cutting costs. The downside of low-cost printers is that the manufacturers cut corners to lower the price point, especially where quality control and safety are concerned. Certain printers have poorer reputations than others (Anet A8 printers seem to be especially fire prone) but even my Creality CR-10S was shipped with a glaring firmware flaw – no thermal runaway protection. The fact of the matter is that all fused filament fabrication printers will have one or two powerful heating elements, and it’s a risk to leave such a device unattended. Thankfully, there are ways to mitigate some of the risk of unattended printing.
For my enclosure, I chose to adapt Henry Arnold’s 3D Printer Safety Shutdown (Thingiverse). The basic concept is that when the enclosure detects smoke, it turns the printer off. It also beeps, a lot. Henry Arnold’s design uses an interconnect-style smoke alarm to trigger a relay, cutting power. Arnold’s design is clever because most 3D printer fires are caused by malfunctioning heating systems or poor electrical connections, and removing power to the printer de-energizes those potential fire sources. Additionally, I think the simplicity of the hard-wired smoke alarm relay system gives it a leg up over a “smart” system with wifi switches and wireless smoke alarms. Henry Arnold’s documentation of his system is pretty comprehensive, so I’ll leave most of the details of the system to his write-up and focus on my modifications here.
Safety
This smoke alarm system won’t stop your printer from burning your house down. The smoke alarm shut down is just another layer of risk mitigation, not a guarantee. If your printer goes up in flames, removing the power from the system won’t make much of a difference if the fire is already self-sustaining. The DIY nature of this safety system means it has no certification, it’s a “better than nothing” type of system.
My “Realistic” Printer Safety Priority list:
- Enable Thermal Runaway Protection in your printer’s firmware.
- Enclose your printer with non-flammable materials, remove/replace potential fuel sources (plastic printer frames, filament rolls)
- Monitor your printer remotely (OctoPrint + webcam)
- Smoke Alarm Shutdown
- Automated fire suppression (eg. engine room fire extinguishers).
Finally, it should be noted that this system uses daisy-chained power strips. Generally, daisy-chained power strips are a no-no, because they allow too many devices to be plugged into a single outlet or extension cord. Too many devices creates too much current draw, and then cords start melting. In this setup, the printer is the only high-power device plugged into the system, the electrical area is covered by the enclosure door, so I’m not concerned. However, if someone is looking to run a space heater and uses your printer’s power strips, you may find the smoke alarms coming in handy.
Smoke Alarm System Function
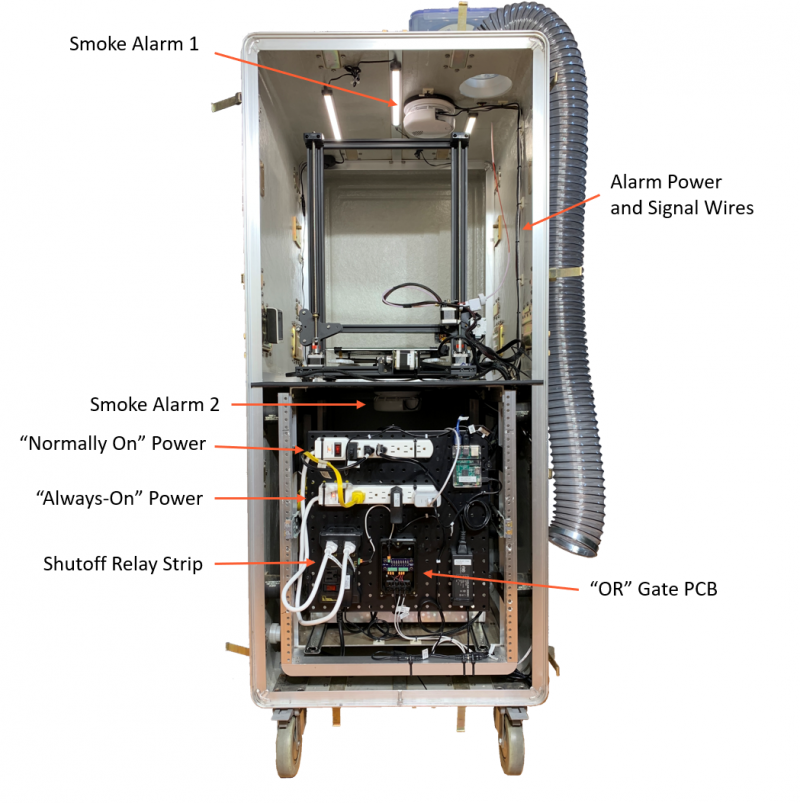
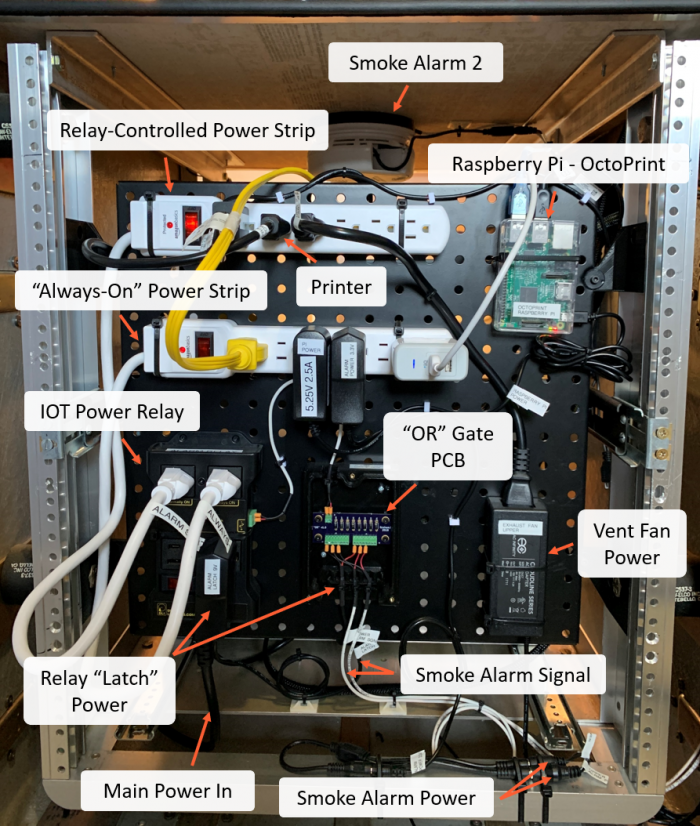
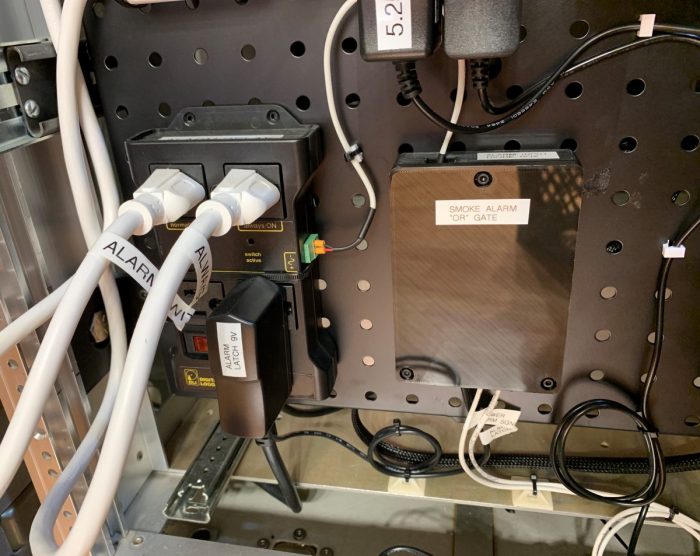
The relay used to shut off printer power has three types of outlets: “Normally On,” “Always On,” and “Normally Off.” I expanded the capacity of the “Normally On” and “Always On” outlets with power strips, labeled in the above diagram.
For normal operation, the “Normally On” outlets are used to power the printer and upper and lower vent fans. When the smoke alarms are triggered, the “Normally On” outlets turn off, removing power from the printer and fans. The vent fans are switched with the printer minimize the flow of air to avoid fanning the flames. The “Always On” outlets power the items that I want to continue to function after the smoke alarms are triggered: Lights, smoke alarm power, and the raspberry pi. The “Normally Off” switch supplies the “latching” power to to the relay, keeping the relay in the triggered state until power to the entire system is reset. The relay latch is one of multiple possible inputs to the relay, so an “OR” logic is necessary.
PCB and Enclosure
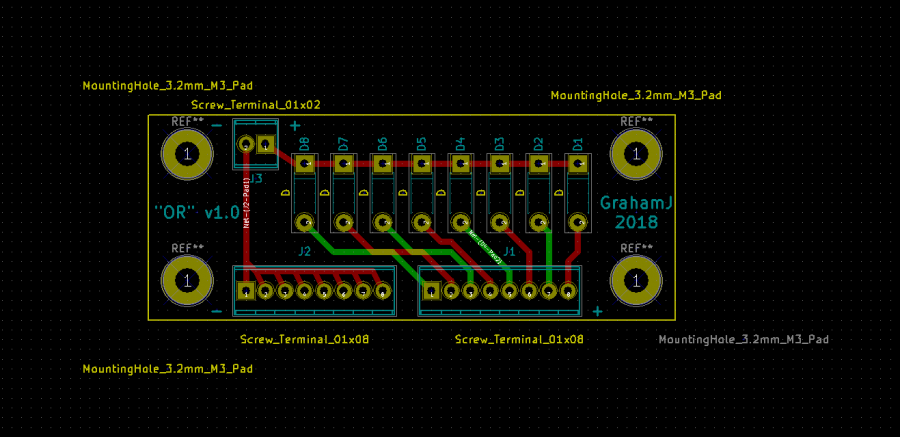
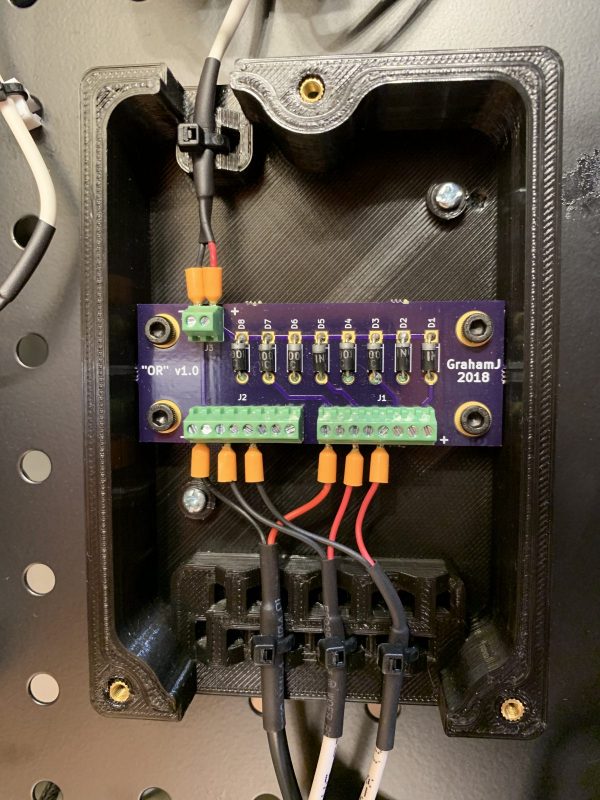
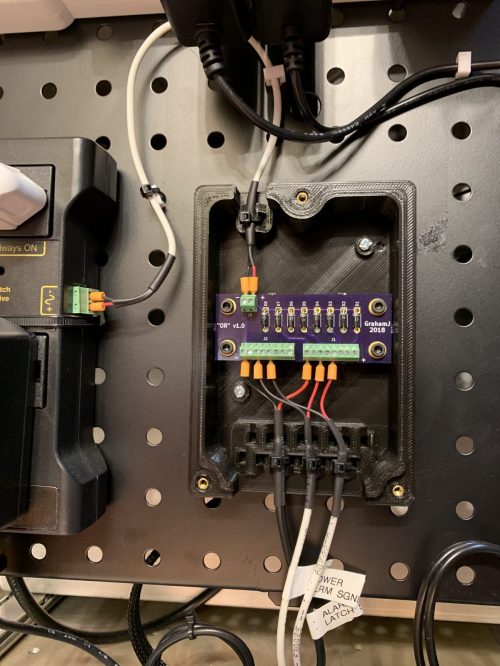
Because my printer enclosure is designed to isolate the control box from the printer itself, the upper and lower enclosures both need to be monitored with a smoke detector. Henry Arnold’s system uses two diodes soldered together to create the “OR” logic that triggers the relays, but I needed at least three inputs, so I created a simple printed circuit board (PCB) that expands the “OR” gate functions with the convenience of wire terminals. A protoboard would have worked fine for this application, but with the cost per PCB of about $5 each, I “skipped a step” and went straight to the PCB. I used KiCAD to design the PCB. This is the first PCB that I’ve designed and made, and I was happily surprised at the ease of manufacturing (I used OSH Park). On the next revision I would round the corners of the PCB, and maybe skip a couple of fasteners.
The component list of the PCB is pretty simple, basically just the diodes and terminal blocks. Here’s the BOM:
- DO41 Diodes – Qty 8 (ex 641-1310-1-ND from Digi-Key)
- Two Position 0.10″ Terminal Block – Qty 1 (ED10561-ND from Digi-Key)
- Eight Position 0.10″ Terminal Block – Qty 2 (ED10566-ND from Digi-Key)
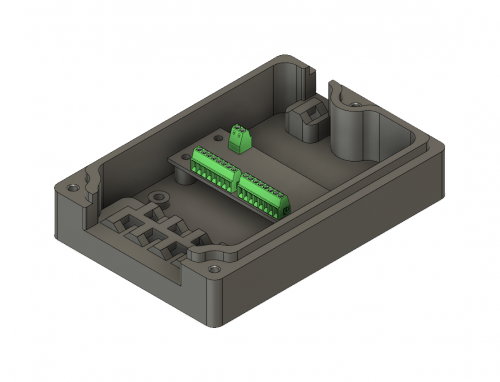
The PCB enclosure was fun to design, this is one of the first practical designs I printed with my 3D printer. The cable tie mounts would be terrible to manufacture traditionally, but I wanted to “cheat” and use the capabilities that are unique to 3D printers. I used M3 heat-set inserts for the enclosure lid fasteners, I like the reliability of machine screws rather than plastic thread-forming screws. The enclosure was modeled in Fusion 360.
You can find the KiCAD file for the PCB and the STL for the PCB enclosure on my Thingiverse Remix of Henry Arnold’s design.
Smoke Alarm Mount and Wiring
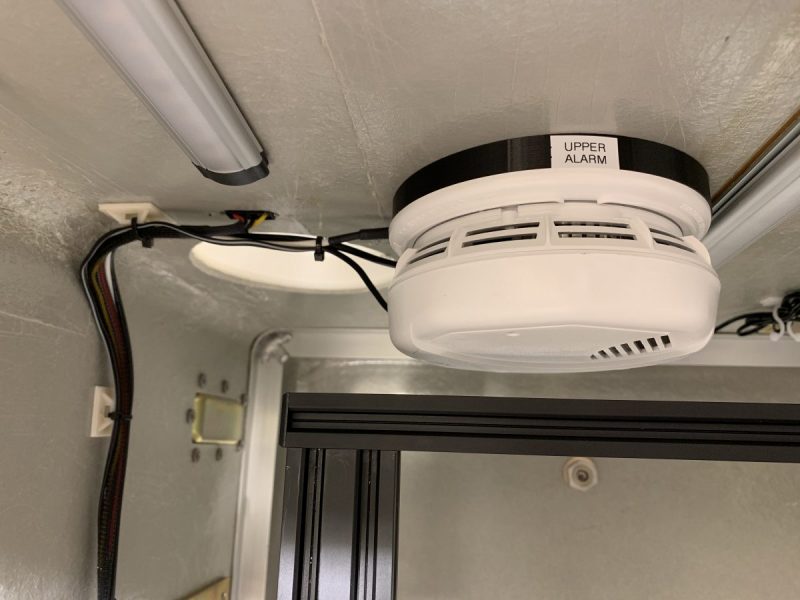
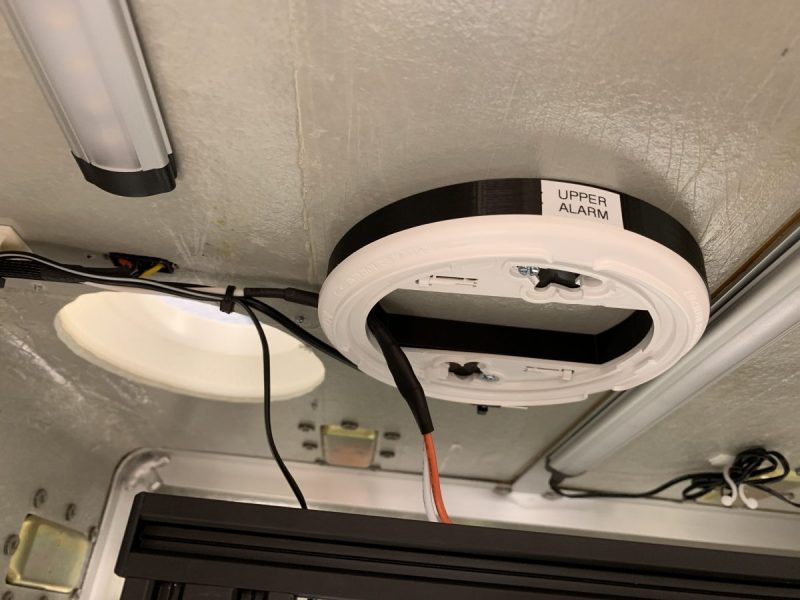
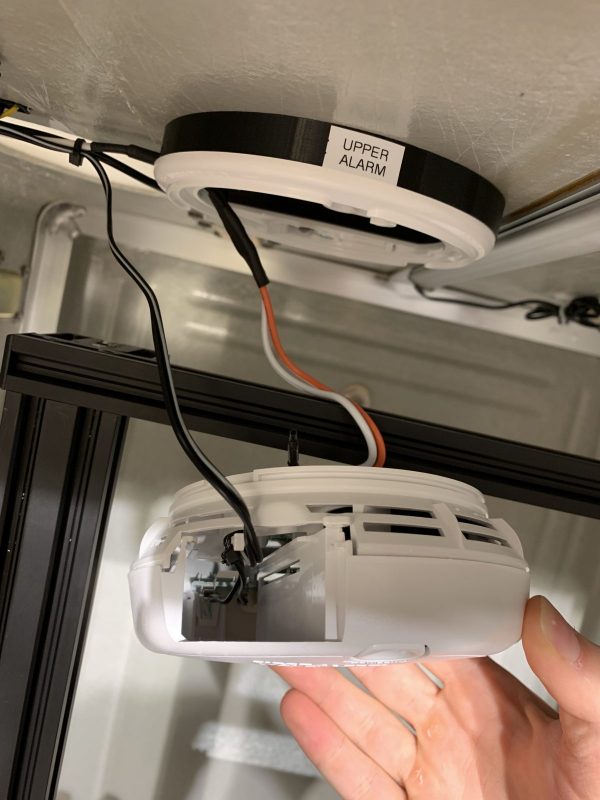
Interconnect-style smoke alarms are designed to be mounted on the ceiling, and they have a connector on the back of each alarm. That connector is designed to send the 9V alarm signal to the other smoke detectors in the system, allowing all alarms to sound at once if smoke is detected. For the printer shutoff, that 9V signal is used to trigger the relay. In my enclosure, it wasn’t practical to cut a recess behind each detector for the 9V signal wires, so I designed and printed a simple spacer bracket. There isn’t much extra space between the detector and the printer, but if it fits, it fits!
The printed mounting spacer allows the 9V signal wires to be routed sideways from the base of the smoke alarm. The orange and white wires picture above are the signal wires. I used crimp-style butt splices (Digi-Key) to connect the wires to a two conductor 18 AWG cable (Also from Digi-Key). The jacket of the cable I used is not very flexible, I would consider using a nicer quality cable next time.
I removed the battery trays from the smoke alarms and soldered barrel connector pigtails onto the battery leads. I think the smoke alarms would be OK with batteries, but because I was running signal wires regardless, I decided to hard-wire the power as well. When installing this system, I was worried about potential false alarms, and wanted a way to easily disable the smoke alarms. In retrospect, false alarms have not been an issue. The smoke alarms are connected to the 3.3V supply with barrel connectors, I used a barrel connector Y-splitter to split the power (Digi-Key). If I were to do this again, I’d consider just using the AA batteries to save some assembly time.
Connectivity and Future Improvements
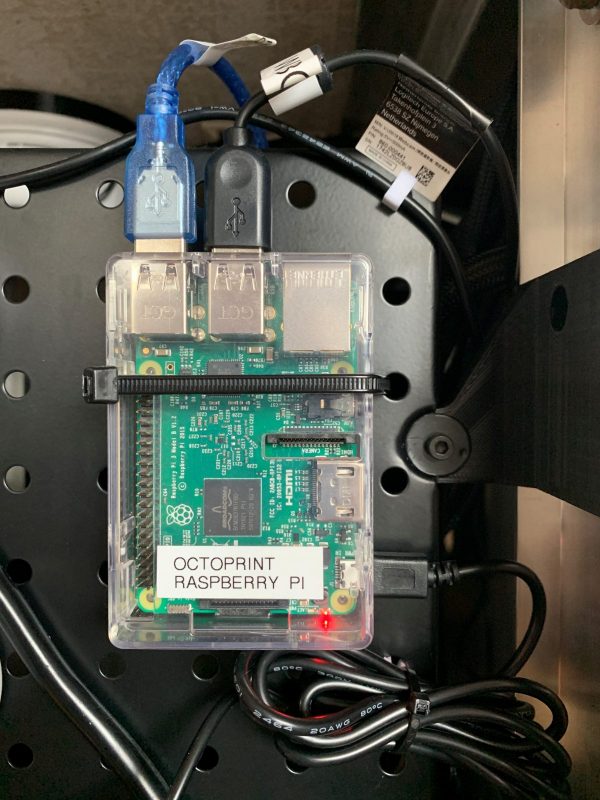
I use a raspberry pi running OctoPrint to control and monitor my printer. Using a VPN running on my home router, I can access the webcam and control the printer remotely, which is valuable for checking in on long prints. In addition, I use Fabian Schlenz’s Telegram Plugin for OctoPrint that sends printer status updates to the telegram app on my phone. The telegram plugin notifies me whenever there’s an issue with the printer. If the printer shuts off and OctoPrint loses connection, I’ll receive a notification on my phone with an error message and a webcam image of the printing area. If the smoke alarm system has triggered, I’ll at least be notified that the printer has shut down, and theoretically the webcam image could tell the rest of the story. This is an indirect notification system, and in the future I’d like to more directly integrate the raspberry pi with the smoke alarm signal.
In the future, I’d like to use the Raspberry Pi’s GPIO to do two things: Trigger the shutdown relay, and read the smoke alarm signal directly. The “OR” gate PCB has extra inputs available, and will accept the Pi’s 3.3V logic signal, so triggering the shutdown relay with GPIO shouldn’t be too hard to implement. I see the shutdown ability being useful as a print control “nuclear option,” or if the printer is printing in standalone (SD Card) mode and something’s gone awry. Running the 9V alarm signal logic to the Pi would provide direct feedback of the smoke alarm condition. Direct feedback would be valuable because it would remove any doubt about the cause of a print shutdown, and would allow me to set up a custom “Printer is one fire” alert that would be harder to overlook.

