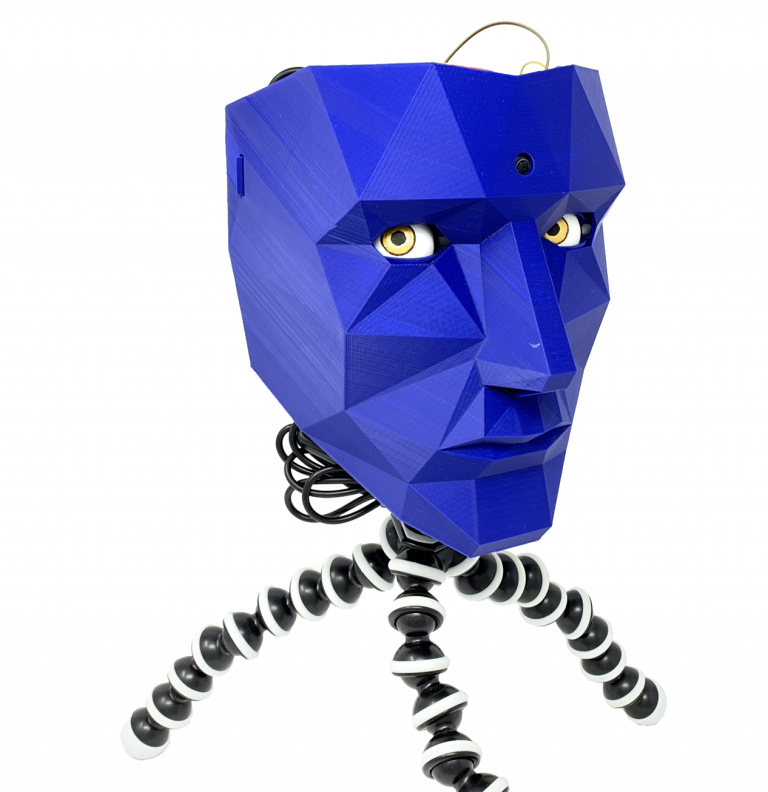
I added face-tracking to a design called the “The Doorman” by Tjhazi (Thingiverse).
Main Achievements - What I Did
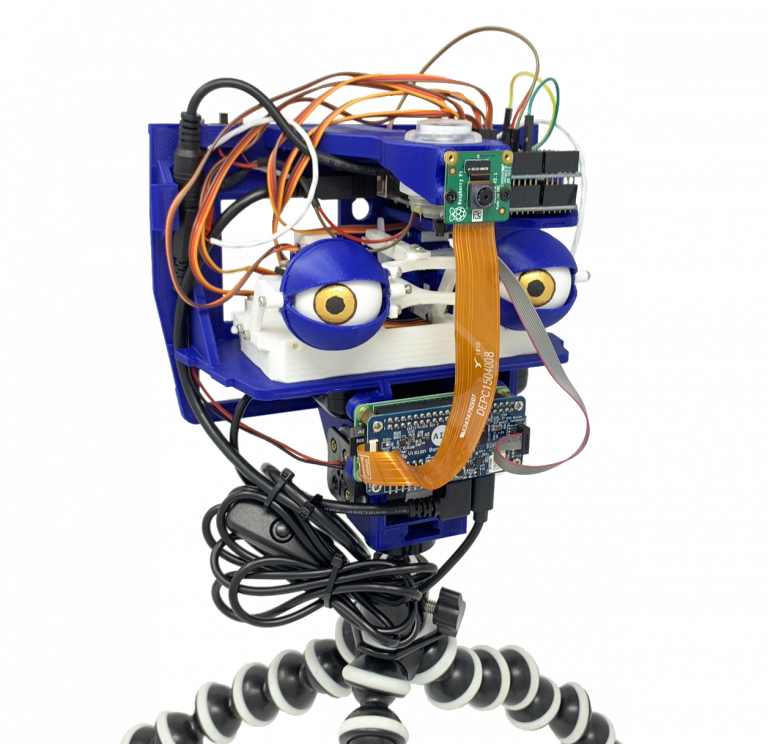
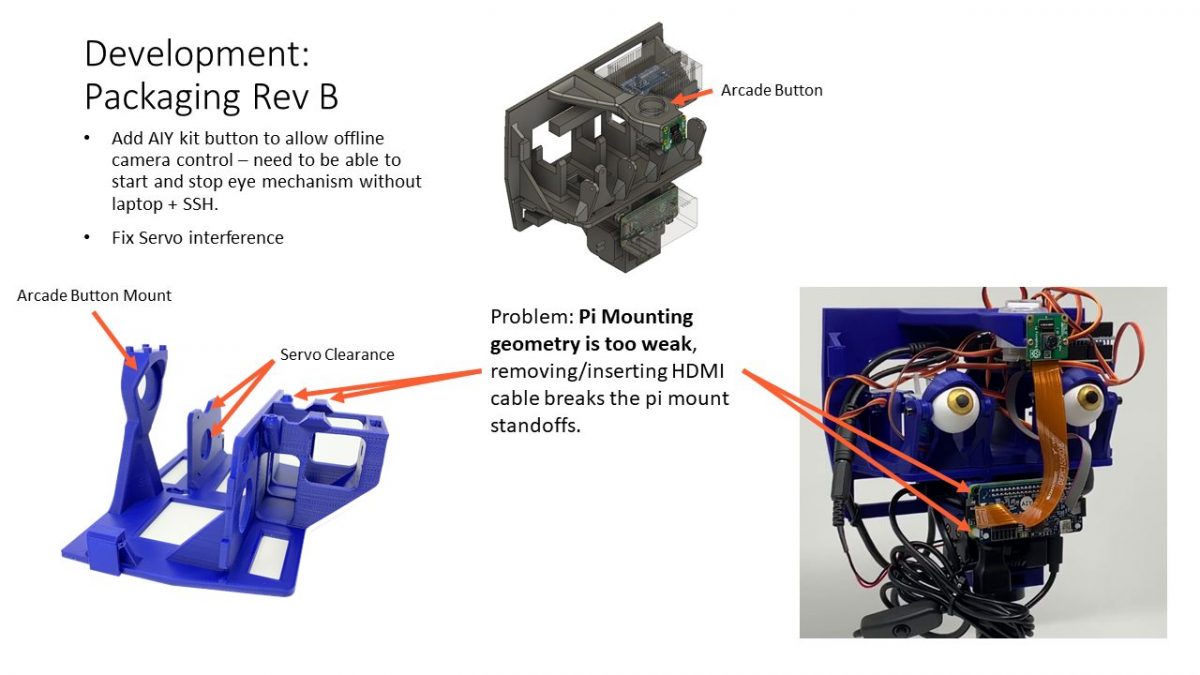
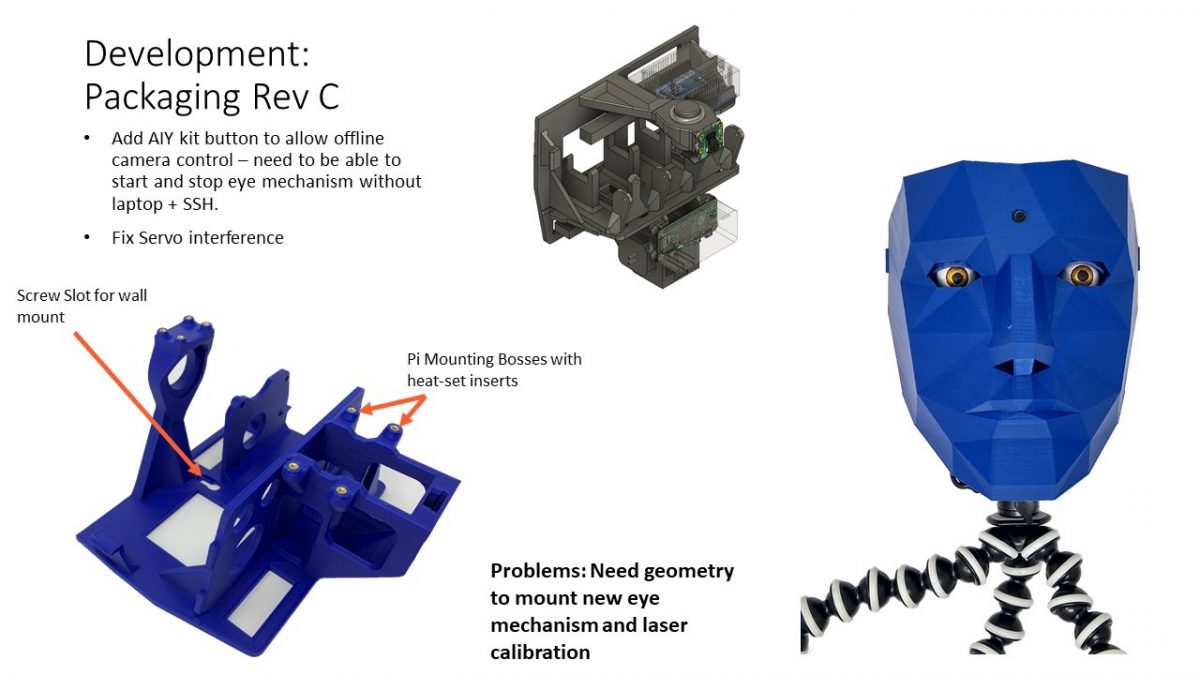
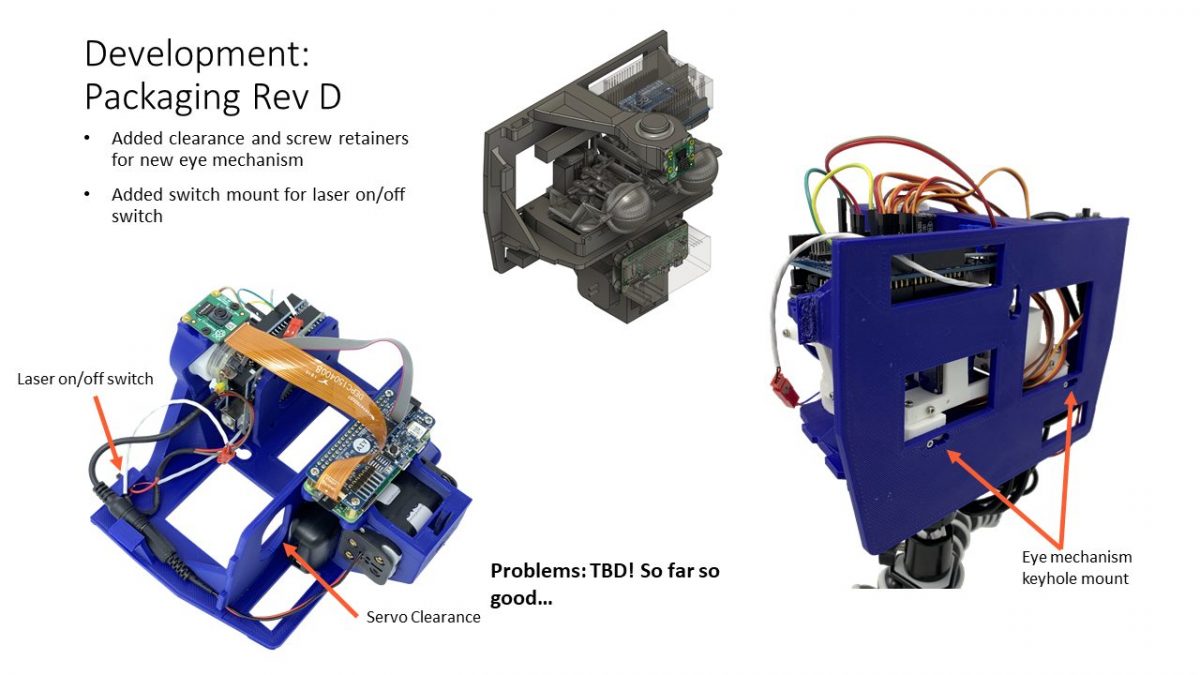
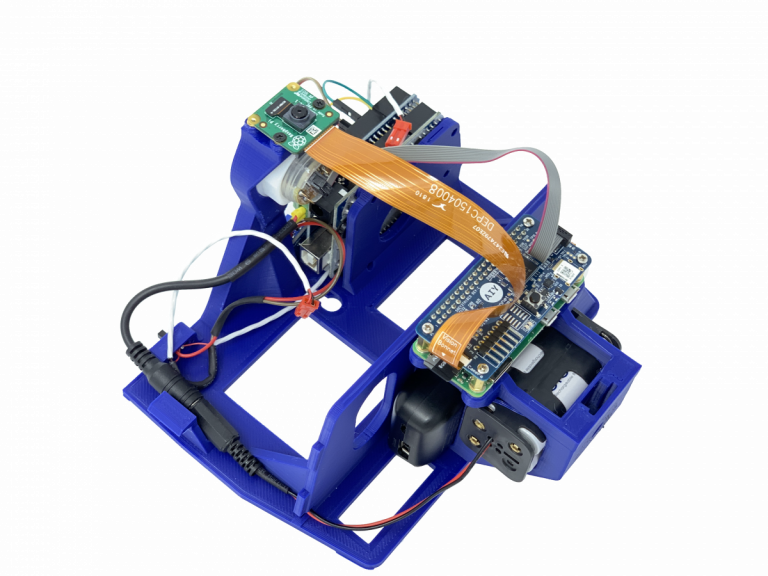
Designed face structure to securely package electronics and allow quick access.
Integrated Google’s AIY Vision Hat for offline face tracking.
Added batteries for mobile use.
Wrote Python and C++ programs to find faces and direct servo positions.
Adapted and upgraded eye mechanism – using Will Cogley’s (Nilheim Mechatronics) advanced eye mechanism.
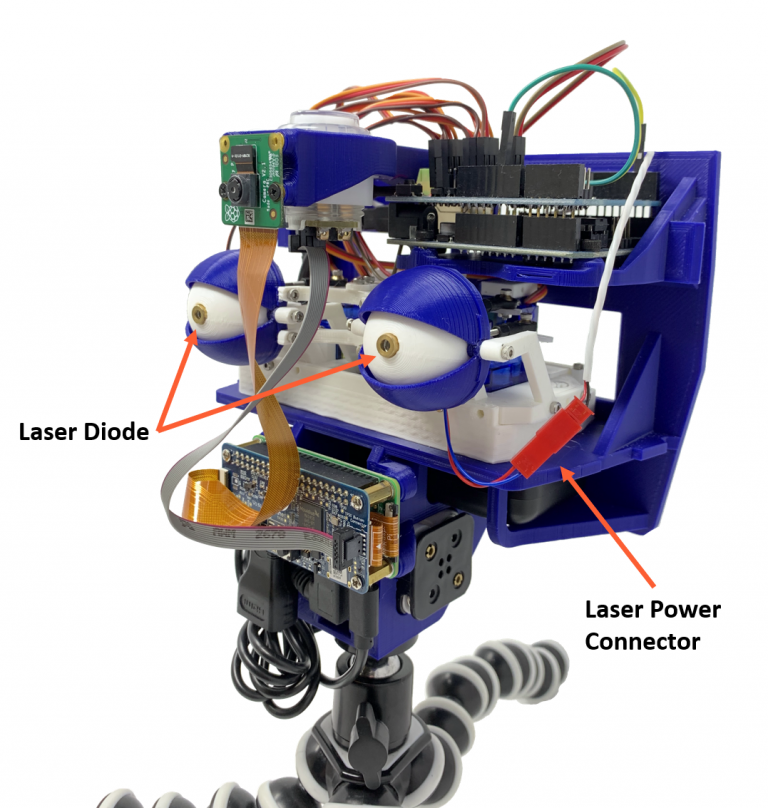
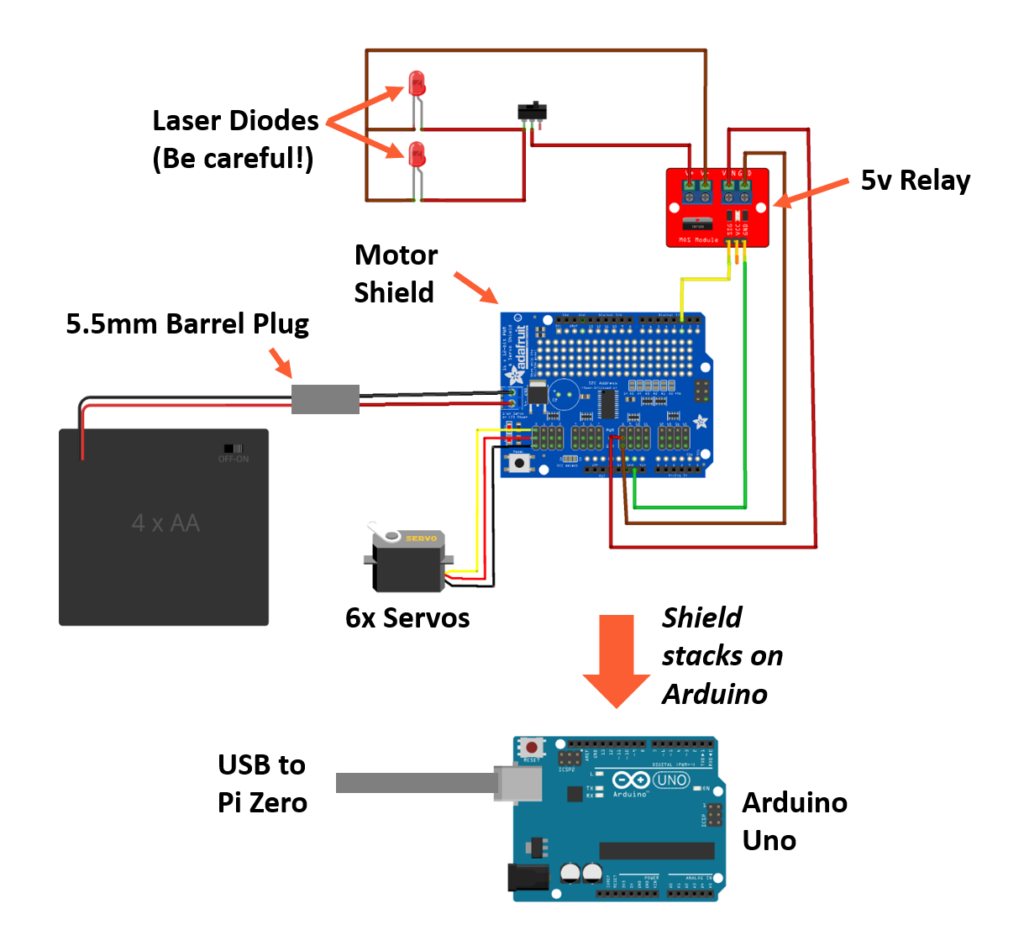
Designed laser accuracy tuning hardware – integrated lasers to tune eye mechanism accuracy.
How it Works
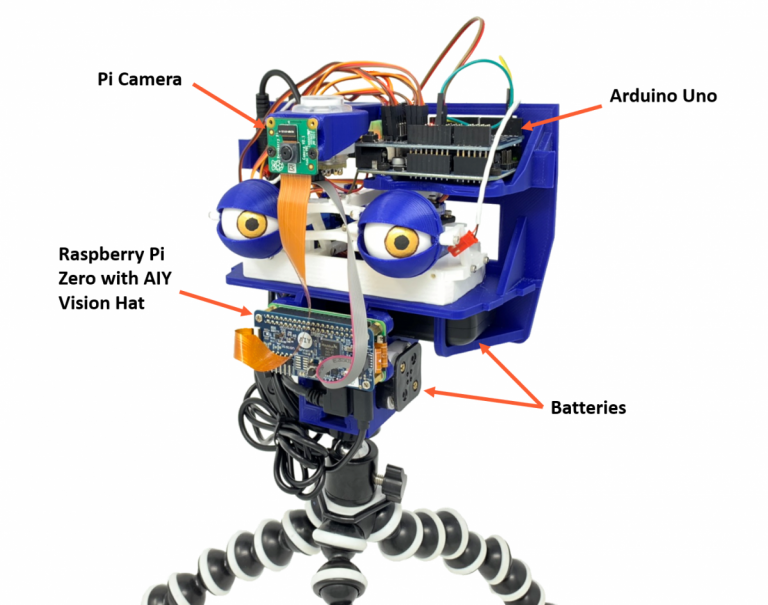
The Watchman’s control system works using the following process:
The Raspberry Pi Camera captures a live video feed of the robot’s field of vision.
The AIY Vision Hat finds faces in the camera’s video feed.
The Raspberry Pi takes the face locations and translates them into servo positions.
The Raspberry PI transmits servo positions to the Arduino Uno via serial.
The Arduino uses a 16-channel Servo Shield to send commands to each servo.
The servos move the eyes and eyelids into position.
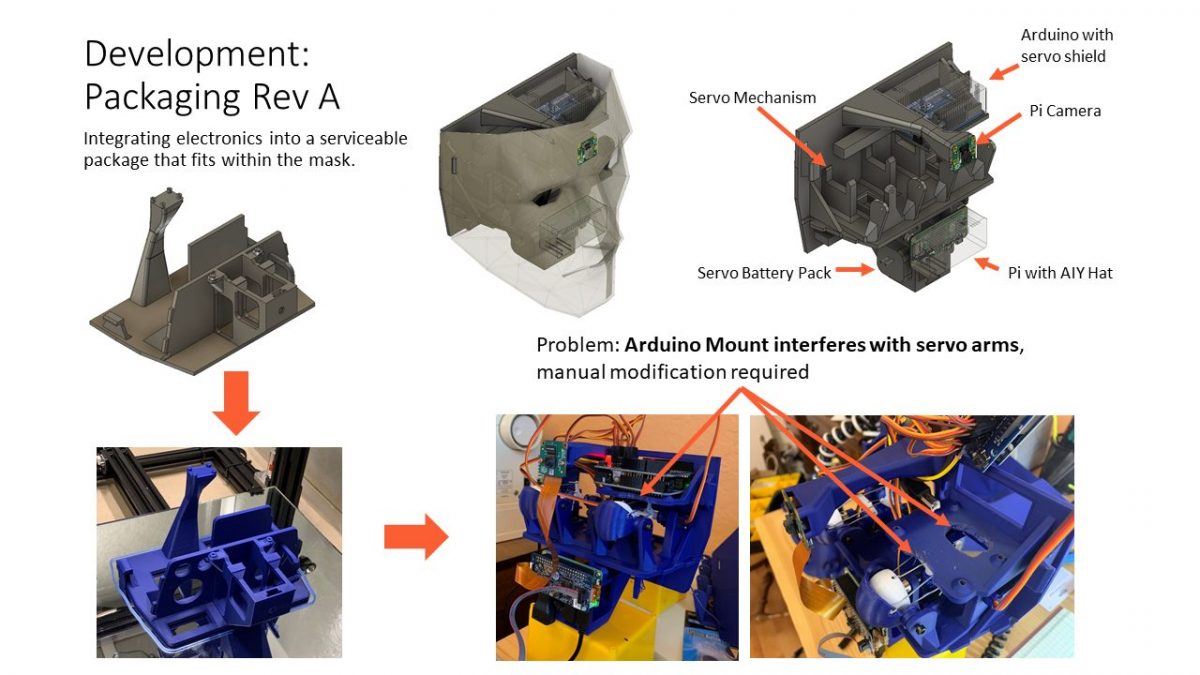
Face Structure Development
The Watchman’s face structure is a 3D printed single piece structure. Using 3D printing allowed rapid design iteration, allowing me to complete multiple design cycles. Because this project is intended to be entirely 3D printed, I was also able to take some liberties to create a structure that would be otherwise un-manufacturable with traditional manufacturing techniques.
Face structure design process (click through slideshow to see design iterations)
The final face structure design.
Face Tracking and Calibration
Early iterations of the Watchman’s face tracking were not very accurate. I knew the face detection software itself was accurate because the camera preview from the raspberry pi shows accurate “bounding boxes” around faces, so that narrowed the inaccuracy down to error in my servo calibration or in the eye mechanism itself. In order to fix eye misalignment, I needed to know where exactly the watchman was looking.
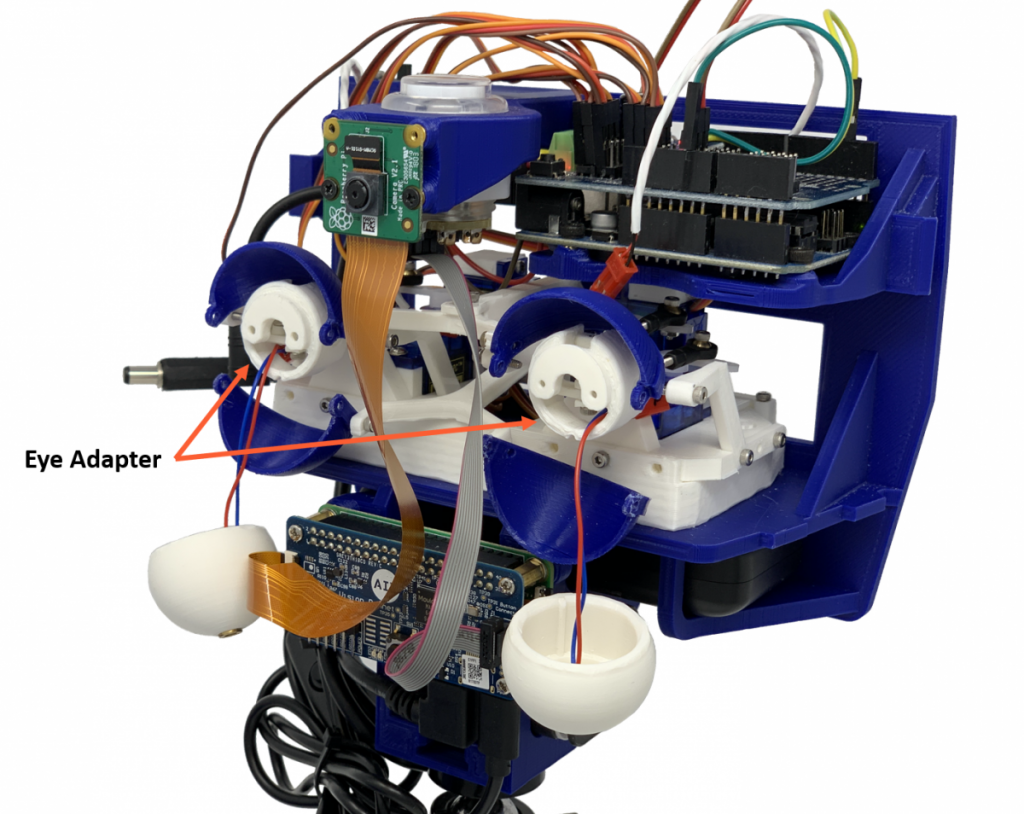
To make it clear where each eye is pointing, I made calibration eyes with 5mW laser diodes. I modified the eye mechanism to add an eye adapter that allows easy removal and replacement of the eyeballs.
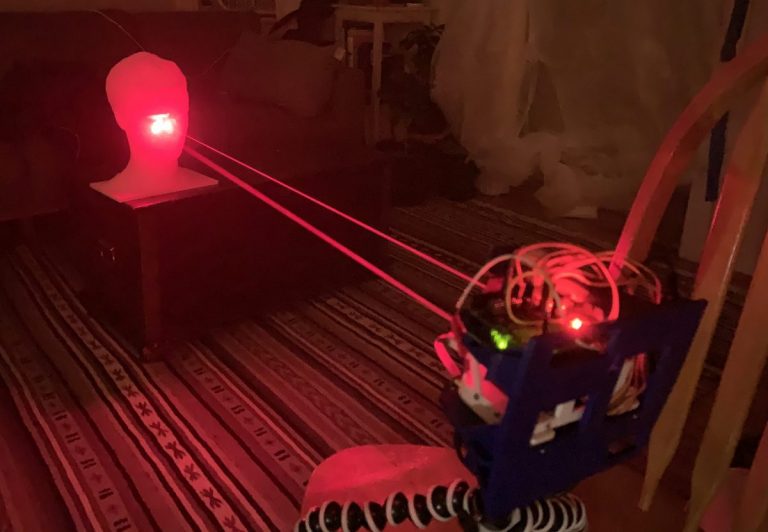
A Note on Safety: Yes, by adding lasers to the eyes of a robot that looks at you, I made a robot that shines a laser in your eyes. Yes, that is a terrible idea. Here’s why I haven’t gone blind yet: I use a stand-in, a 3D print of my head. The face detection model on the AIY Vision board easily finds 2D (and 3D) prints of faces. Also, the ultimate (in)accuracy of the eye tracking mechanism also means that it doesn’t end up continuously lasering you directly in the eye; it’s fairly easy to escape its gaze if you walk into its field of view while the calibration lasers are on.
My 3D-printed stunt double at work.
Calibration Results: The lasers are a double-edged sword in that they allow you to improve the system’s calibration, but they also point out inaccuracies that are inherent in the mechanism. Mechanically, there is backlash in the eye linkages and the servos themselves, which results in varying accuracy as the eyes move back and forth. The good news is that the eye tracking effect with the “normal” eyeballs is quite good, and ultimately the lasers allowed me to greatly improve the accuracy of the overall eye mechanism. Most of the calibration is done within the Arduino sketch. I used an image overlay on the Raspberry Pi’s camera feed to adjust the eye position until the lasers were centered in the center of the camera’s field of view. Then, the lasers allowed me to tune how the Raspberry Pi’s python code maps face positions to servo angles.
If you’re using lasers, may as well use a fog machine too, right?
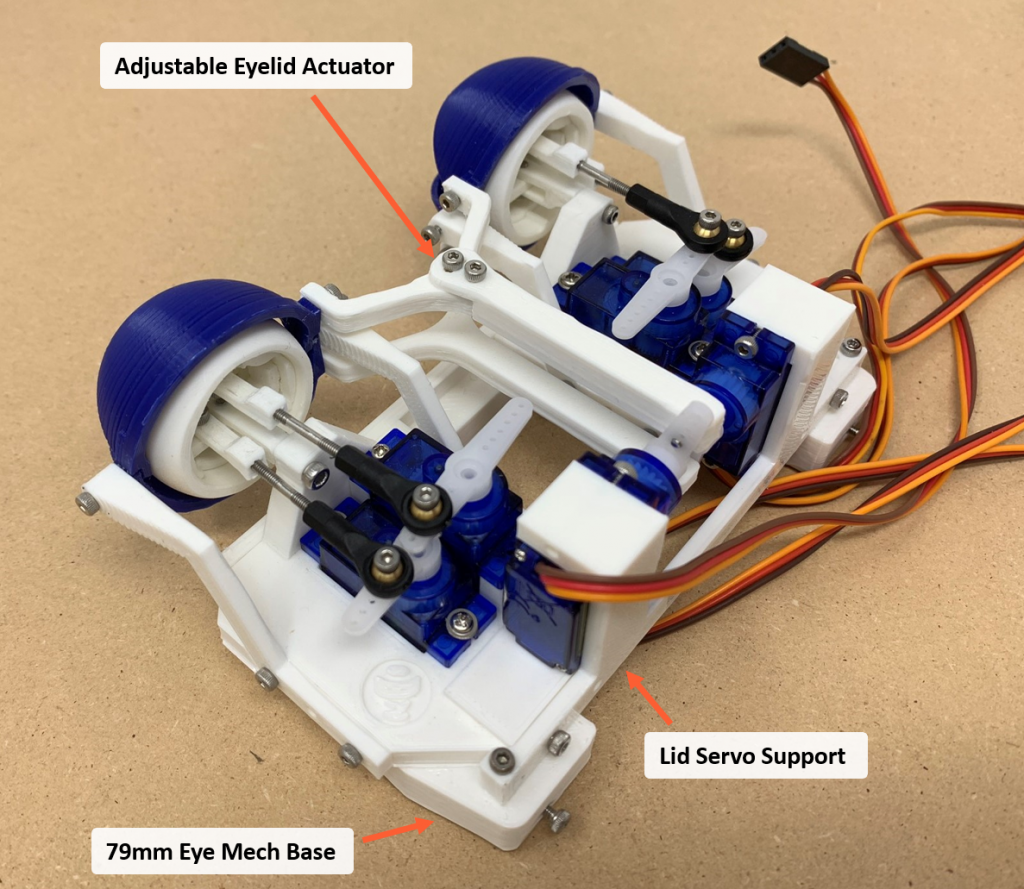
Eye Mechanism
I used Will Cogley’s (Nilheim Mechatronics) eye mechanism for the Watchman. I modified a few of the components to make the following changes:
Increased eye spacing to 79mm – necessary to fit the mask.
Made the eyes removable with a new eye adapter – eyes now secure with a screw.
Added an adjustable eyelid actuator – this allows the eyelids to be adjusted so that one does not close before the other.
Added a base that mates with the watchman’s face structure.
Made an eyeball that holds a laser diode – for calibration.
Increased the clearance on the eyelids – allows eyelids to close even while lasers are installed.
Added larger servo support – fits with wider eye spacing.